
Understanding Popcorn Ceilings
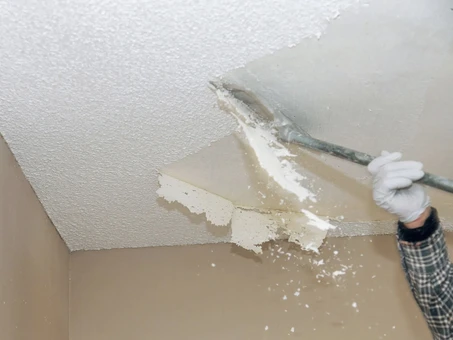
Popcorn ceilings, also known as textured or stippled ceilings, were once a popular choice for their acoustic properties and ability to hide imperfections. However, tastes have evolved, and many homeowners now prefer the clean and modern appeal of smooth ceilings. **Tools and Materials You'll Need:** - **Safety Gear:** - Safety goggles - Dust mask - Disposable coveralls - Gloves - **Tools:** - Garden sprayer or spray bottle - Putty knives or joint knives - Plastic sheeting or drop cloths - Painter's tape - Plastic garbage bags - Large garbage bags or a disposal bin - **Materials:** - Popcorn ceiling removal solution (commercial product or a DIY mixture) - Water - Joint compound - Sandpaper (medium-grit) - Primer - Paint of your choice **Step-by-Step Guide:** **Step 1: Prepare the Room** - Move Furniture: Remove or cover furniture with plastic sheets to protect them from dust and debris. - Cover Flooring: Lay down plastic drop cloths to protect the floor. - Turn Off Electricity: For safety, turn off the electricity to the room. **Step 2: Test for Asbestos** - Call for help: Hire a local hazardous materials testing company to test for asbestos. - Do it yourself: Purchase a DIY testing kit and follow the instructions. Be sure to wear appropriate PPE such as googles, gloves and mask while collecting a sample. Assuming the test results are negative for asbestos proceed to step 3. **Step 3: Wet the Ceiling** - Spray the Ceiling: Use a garden sprayer or a spray bottle to wet a small section of the popcorn ceiling. - Let it Soak: Allow the water to soak into the texture for about 15-20 minutes. **Step 4: Scrape the Popcorn Texture** - Start Scraping: Use a putty knife or joint knife to gently scrape off the wet popcorn texture. - Work in Sections: Focus on one manageable section at a time to avoid overwhelming yourself. **Step 5: Clean Up** - Dispose of Debris: Place the scraped texture into garbage bags or a disposal bin. - Clean the Room: Remove plastic sheeting and drop cloths, ensuring all debris is disposed of properly. **Step 6: Repair and Finish** - Patch and Smooth: Use joint compound to patch any imperfections or gouges left during the scraping process. - Sand Smooth: Once the joint compound is dry, sand the ceiling surface to achieve a smooth finish. **Step 7: Prime and Paint** - Prime: Apply a primer to the smoothed ceiling surface to create a suitable base for paint. - Paint: Once the primer **Conclusion:** Congratulations! You've successfully bid farewell to the popcorn texture, unveiling a smooth and contemporary ceiling that adds a touch of modern elegance to your home. Remember, patience is key, and taking the time to do each step properly will result in a beautifully transformed living space. Enjoy your new, updated look!